Welcome to Modderhood

def. 1 Mod*derhood (mad-der-hud) 1) A mama of multiples with a modern style yet old school values

Tuesday, April 26, 2011

Hey, 2011...Slow Yo Roll!

It has been almost 4 months since I have updated this blog.  Absolute craziness!  I can not believe how fast the time has flown by this year.  For all those intently interested in all things Modderhood, here are a few highlights of our year so far:

We brought the New Year with some of our great friends.  

The kids had an incredible time playing together (ie. destroying the house) while we played board games and drank champagne out of these super cool glasses:

Merrick actually stayed up to midnight for the first time ever.  Even more surprising than that, I was able to stay up to midnight...

February brought on a crafty Valentine's Day.  I don't know why, but I really got into the VDay spirit this year.  Every food was heart shaped for about a month and I spent about 4,237 hours making a wreath for the door.  I also started a new craft blog about this time, OnesieTwosie (after my Etsy store), to chronicle all the crafty craziness...
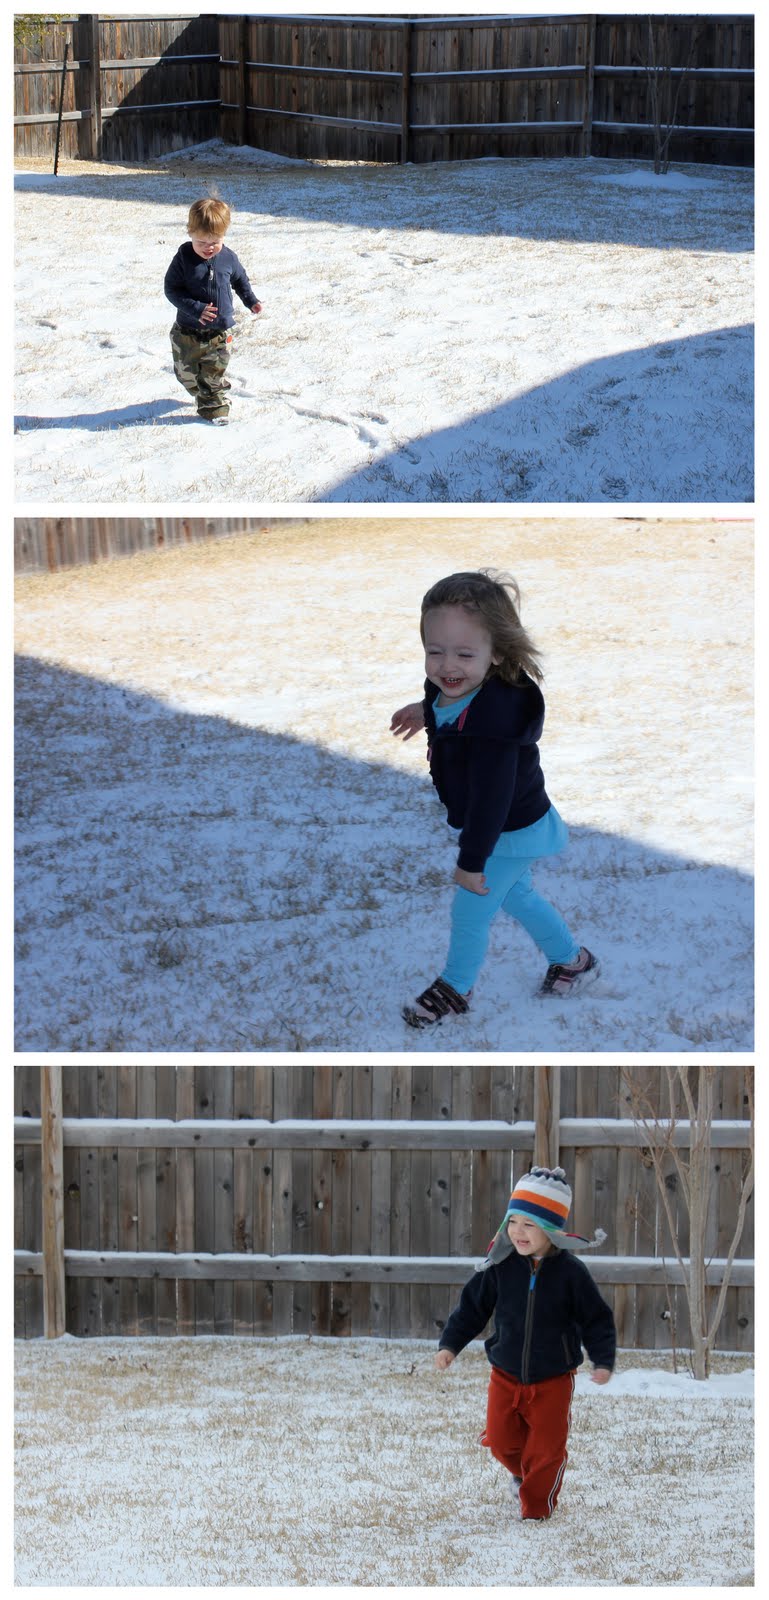
We had snow in Austin...for about 24 minutes.  It was the twins' first time playing in snow.  I don't think they liked it too much, but maybe that's because Mommy wasn't quite prepared with gloves and the like that people have in places where the weather tends to get below 100 degrees.

In March, Marcos and I snuck off to a marriage retreat with our church which took place at the Hyatt Lost Pines.  What?!?!  This place is ridiculously amazing.  I'm so hoping we can go back for our anniversary and stay a bit longer.  It was just so relaxing.  I didn't have to do any laundry or pick smushed green beans off the floor.  Marcos and I went on little adventures together throughout the campus.  In one day I took 3 showers and watched about 3 episodes of Hoaders back to back.  I slept in without being woken up by, "Mommy!!!!"  Pure heaven.

Jagger and I have also started doing some homeschooling.  I started a little blog, Gettin' Skooled, to document what we're learning.  It is such a joy to watch Jagger grasp a new concept and then hunger for more.  Recently, we've started on our "read-aloud" books. We've also studied out dinosaurs and space. I'm indescribably proud of Jagger.

Also in March, we visited Dallas with my parents.  Our favorite part was spending the morning at the aquarium.  Let me just say...I had no idea!  There is a 3 story building in the middle of downtown Dallas that is home to thousands of beautiful and complex creatures.  The children went nuts.  As I stood in front of the tank with a ginormous anaconda (ie. 25 foot snake) I kept thinking, "This is not where I'd want to be standing in the event of an world altering earthquake."  

I've also made some little paintings in 2011.  I am working on decorating my craft room as well as putting some new paintings above Lulu's crib.  I figured out a new technique called direct image transfer about which I'm especially excited (bottom image).

Marcos and I got the great privilege of traveling back to North Carolina (where I was born and bred)  to attend the wedding of my childhood best friend.  What an amazing experience to be playing Barbies with your friend at 4 years old and then turn around and see her walk down the aisle (ironically, looking like a Barbie).  She was a beautiful, fun, and graceful bride.  It was so great being back in NC and seeing several of my childhood friends again (and getting to introduce them to Marcos) as well as my beautiful family.  Marcos also got to see "mountain dancin'" for the first time.  He then proceeded to tear up the dance floors with moves for which they have no names.  

Shortly after this, Marcos ran in the Capitol 10K here in Austin.  His brother, Henry, also took up the challenge.  Marcos's high school bestie, Jason, woke up at crazy-man hours that morning to drive from Houson to Austin to see Marcos run the event.  What a great friend, no?  

I was so proud of Marcos.  He was so disciplined in his training (surprise, surprise) and shaved 10 minutes off his time from last year (more than a minute per mile).

The same weekend, I drove down to San Antonio a couple of times to be a part of the Taliaferro's short film, Recalculating.  This was so exciting for me, as I had not acted in quite a while.  Mike Taliaferro leads our sister church in San Antonio and also runs an incredible site, ICOC Hot News, which reports news from all of our sister churches from around the globe (ie. when there is an earthquake, tsunami, or civil war, he is Skyping the dudes on the inside and letting us know what's really going on...intense stuff).  His son, Nate, is a film major at UT Austin.  Together, they have made several short films to help spread God's word as well as unify Christians.  

Soccer season has also begun.  Jagger is a rock star on the field.  He has really, really grown since last season.  Instead of grabbing his opponents by the shirt and trying to throw them to the ground when they have the ball, he actually gets on defense and guards the goal.  Last week, he made his first goal ever!  Like I said...rock star.

These past couple of weeks, we decided to try something new.  After reading this post here, I decided we must get our family into the vegetable gardening gig.  I do not have a green thumb, but so far, everything is still alive.  Yeah!

And then, of course, this past weekend was Easter.  Marcos took Friday off and we had an incredible weekend together as a family.  More on this to come!

What a great 2011 so far.  It's been a bit busy, however.  I'm currently training for the Capital 2K Swim coming up this Sunday.  After that, I plan on doing nothing but sewing, reading, painting, and spending time with my family.  I'm ready for some down time!

Wednesday, December 29, 2010

Christmas in Pictures *2010*

Here are a few pics of the Esparza Christmas 2010...

THE NELSON HOUSE

Uncle Henry got both Scout and Sawyer stuffed animals that were each 3 feet tall.  The kids went nuts.  So did I, when I realized we were going to have to travel back to Austin squeezed inbetween 25 feet of stuffed animals.

This is Mirna's face when she received a laptop from her sister (my mother in law, Leticia) for Christmas. This is completely different from the face she made when opening up her present from us.  We gave her a caramel amaretto soy based candle - one of the most incredible smelling candles I've ever come across.  Shortly after she unwrapped it, we learned she had no sense of smell.

One of my favorite moments is when Carlos received a green gift card (not the one pictured) for Christmas, then turned to his wife, Rebecca, and said, "Look, honey, we're legal!"

Merrick kissing his beautiful (and sleepy) Aunt Lynda.  He was so excited about the talking microscope she gave him for Christmas.  

Bita (short for Abuelita, Spanish for Grandmother) gave each of her three youngest grandchildren a rocking horse.  I love Priscilla's face in this pic (in the back).  She's screaming, "Get me off of this thing!!!!"

AT THE HALL HOUSE

Mama looking good.  Shelby getting socks for Christmas.  

Once again, Scout is swallowed up by her Christmas gifts.

Mama opening her gift from me.  Subway Art!  Read that story here.

Daddy reading the real Christmas Story from Luke 2

Beautiful Christmas Decor

I love checking out my parents' tree every year and seeing all the ornaments from my childhood.

Grandmother came to visit and...

...brought us some North Carolina BBQ!!!

Mama's garland on her front door (1 of 2).  Isn't it beautiful?  I love the music theme.

The kids went outside to play with cousin Jack's helicopter.  I love how kids so quickly seek to destroy their toys.  One kid would fly the helicopter while another kid would try to knock it out of the sky with a soccer ball.  After that got old, they decided to use the soccer ball to try to hit BDaddy (my dad) "in the privates."  Sawyer loved every minute of this.

My favorite picture from Christmas.  Sawyer loves his BDaddy so much.

Merry Christmas to all.  :)

Sugar Plum Treats

Here are some pics of the little treat Merrick and I decided to make for all his friends in his class at Mother's Day Out.  This year, Merrick became obsessed with marshmallows and gingerbread houses (and anything else that was pure sugar) so when I stumbled across this recipe, I knew it was the perfect treat for us.   

I love making little treats like this with Merrick.  One, it keeps him within my line of vision and in an area of controlled chaos.  Secondly, I get to eat about seven or eight of them when he's not looking.  C, if I train him right now, I could have him cooking dinner by the time he's seven years old.  That's the plan, anyway.  


Tips: 
The best thing about this "recipe" is that it only takes about 10 minutes to complete.  There are two things I would suggest if you decide to make these yourself.  One, don't "dip" the candy coated marshmallows into the sprinkles.  Instead, put a few sprinkles in the palm of your hand and pour them on the marshmallow (over a bowl, of course).  The second tip is to buy a little piece of styrofoam to use to stand the sugar plums up as the candy coating is hardening.  Both these tips are to prevent the candy coating from getting smooshed.  

Monday, December 6, 2010

Crazy Christmas Shopping

I spent two and a half hours running Christmas errands with my three gremlins this morning.  I remember a few years ago when I completed my first year of shopping with a 6 month old in tow.  I thought life was soooo hard.


This morning, I spent 45 minutes in Hobby Lobby only to walk away 1 piece of black felt.  I had spent a whopping 27 cents (note to husband: not that my success while shopping is determined by the amount of money spent, of course...love you, baby).  Next, we went over to Target where the goal of my children was to impress upon every stranger passing that I was an abusive mother who had not showered in three days.  OK, maybe the not-showered-in-three-days impression had more to do with me than the kids, but you get the idea.

I'm not sure what drove me most nuts.  Was it when my 4 year old shouted out, "Mommy, that guy smells like the Stinky Cheese Man!" while pointing to a Target employee?  Perhaps when my twin boy kept throwing out every single thing I put in the basket forcing me to carry (and constantly drop) socks, toy cars,  and lady stuff even though I chose a cart the size of Texas itself.  No, despite the heavy competition from her brothers, the thing that I think drove me most nuts was the constant high pitched squealing from my daughter.  Put her in the basket - cry.  Hold her - scream.  Put her in the seat of the cart - wail.  Some times I wish I had a t-shirt that said, "Please don't call CPS.  I promise I don't beat my kids."***

During our crazy shopping time, I kept looking for the good.  "Sure," I told myself, "these kids make shopping insanely difficult, but it's all worth it because they are so adorable....right?"  I kept looking for adorable, cute things that they'd do, but they didn't really do any cute things.  It was mostly just wailing and hitting and pinching and biting.

However, once we got home they reminded me, as they always do, why I don't sell them to some under staffed sweat shop in China.  Merrick went to the restroom and, as he always does, came out with his hands held out proudly.  "Smell my hands, Mommy, " he said.  He loves for me to smell the candy cane soap after he washes his hands.  Then, my daughter, as she always does, imitated her big brother and held her hands out for me to smell as well.  "Mmmmm...." I said, even though she had not washed her hands and they smelled like boogers and mac and cheese.

I truly dislike shopping with my kids.  But, man, I loooooove, looooove, looooove my kids.


***As a side note, I think it would be hilarious if the back of the shirt said in very small print, "though if I did beat them, they probably deserved it..."

Wednesday, November 17, 2010

Three Tier Tutu Tutorial (say that three times fast...)


There are many-a great no-sew tutorials out there.  However, when I got it into my head to make my little Scout a three tier tutu, there was very, very little to be found.  So, here is a tutorial I put together for all those out there like me who like to see their little Princess all but swimming in tulle.

Initially, I started making this with the idea it would have an elastic waste.  Once I was knee deep in tulle, however, I decided to make it an apron tie waste so that my daughter could continue to wear it for a few years (and so that I can wear it when no one is looking).  

The upside to this project is that tulle is relatively inexpensive.  It cost me about $1 per yard.  The downside, of course, is that working with tulle is almost as difficult as getting your daughter to take a cute picture in the tutu after it's finished.  However, with a bit of patience and a bit more time, you can do it!

I'll refer to the colors green, red, and pink for the purpose of this tutorial, but you can use any three colors you prefer, obviously. 

Let's do this thing:
Supplies Needed
Green Tulle - 4 yards
Red Tulle - 3 yards 
Pink Tulle - 2 yards
Coordinating Thread
Safety Pins
Coordinating fabric
Coordinating Ribbon
Sewing Machine
Sewing Needle
Cutting board, Ruler, and Rotery Cutter (these things would technically be optional, but I imagine it would be very difficult without them)


First, you've got to get your measurements.  The measurements you'll need for this are the waist measurement and the length you want each tier to be.  My 18 month old daughter, for example, has a 19 3/4 waist (I round up to 20).  I decided I wanted the tiers to be 7, 9, and 11 inches long.  It's as simple as that!

Cut each layer of tulle.  The width will be same length as the desired finished length (in my case, 7, 9, and 11 inches).  The length will be 2 - 2.5 times the waist measurement (the longer you make it, the more rufflely it will be).   Cut between 4 - 8 pieces for each layer.  Per my example, I cut several pink pieces 7 x 50 inches.  Then I cut the red pieces 9 x 50 inches and the green 11 x 50 inches. 

Set your stitch length to the longest possible length (mine is a 4) and sew a straight line 1/2 inch away from the edge of EACH piece of tulle.  Don't worry - this goes pretty quickly.

Tip: You can sew two pieces (of the same color) together if you like to save time.  Just be careful that the edges are aligned.  To do this, simply line up the very ends, sew about 6 inches, realign the edges, sew 6 more inches, and repeat til the end.

After sewing the edges of each piece of tulle, gather each piece.  To do this, pull very gently on the bottom thread of each line sewn.  Pull a little on each side, then push the ruffles along the thread so that they are even all the way across.  Adjust the ruffles so that the length of the tulle is 3 inches shorter than the waist measurement (for my example, I stretched each piece to 17 inches).

Tip: Now is a good time to lay each layer of tulle to see how the colors look.  If one color doesn't "pop" as much as the others, add more pieces of that color.  For my daughter's skirt, I noticed that the green needed more pieces that the red and pink in order to stand out. 

Ohhhhh....ahhhhh....pretty tulle.....

Now take each color layer and safety pin the pieces together.  Start on the edges, making sure each piece is aligned.  Next, pin the middle, then pin in between the middle and edges.  Use at least 5 pins.

Now pin all three layers together using the same order as above.  Be sure that all the edges stay relatively aligned and that the middle pieces don't drop.

Tip:  Use smaller safety pins for pinning the individual layers and larger safety pins for pinning all three layers together.

With a sewing needle and coordinating thread, sew the three layers together by hand.  This does not have to be perfect.  Just make a stitch every 1/2 inch or so, enough to secure the three pieces together.  The picture above is what it should look like after the layers are sewn and the pins are removed.

Tip:  Use the original straight stitch line as a guide.
Time to make the band!  Cut a piece of coordinating fabric 5 1/4 inches x 1/2 inch shorter than the waist measurement.  My piece was 5 1/4 inches by 19.5 inches (for a 20 inch waist).

Fold over each edge of the fabric 1/4 inch and press then sew.

Break out your iron.  Fold the fabric in half an press.

Open up the fabric.  Fold the edge of each side in 1/4 inch and press (for a picture of this, see 3 pictures down).

Now fold the edges just below the crease in the middle and press again.

Now fold the entire piece in half again and press yet again.  This is the same method you would use when making bias tape.

Next, pin the edge of the fabric to the back of the tutu (green side).  The right side of the fabric should be touching the tulle.  Pin so that the edges of the tulle are even with the edge of the fabric on the top.  There should be about 1 inch of fabric left over on each side of the tulle skirt.

Using your sewing machine, sew just above the first crease in the fabric.  This should be about an inch from the edge.

Now, flip the fabric over and fold the last quarter under so that it looks like the picture above.  There should be no raw edges showing.  Pin in place and sew, being sure to remove the pins as you go.

Cut two pieces of ribbon about 25 inches long.

Stick one end of the ribbon inside the end of the fabric band.  Repeat on the other side

Tip: Use a lighter to slightly burn the outter raw edges of the ribbon to make sure it doesn't fray.

And...voila!   An adorable Christmas Princess Three Tier Tutu!!!

If you take a stab at this tutorial, be sure to let me know!  I'd love to see pictures of your three tier tutu!

Enjoy!